
If we are faced to handle large data processing in a relatively short time, for example, online shop transaction log of an e-commerce company, then we need a tools which enable to do the comprehensive analysis and search of logs. One of the tools that can be an option is Elasticsearch. Elasticsearch is an open source platform for full-text search and analytics engines. Elasticsearch allows us to store, search and analyze large amounts of data in real-time. In this tutorial, we will guide you how to install Elasticsearch on Ubuntu 20.04 operating system.
Elasticsearch Installation steps on Ubuntu 20.04 LTS
Prerequisites
Before we start the installation process of Elasticsearch on Ubuntu 20.04 operating system. We have to prepare the system environment first. In this tutorial, we will install the last version of Elasticsearch (version 8.5.) which will be installed on Ubuntu 20.04 operating system.
We have prepared the environment for this installation :
- Ubuntu 20.04 LTS operating system
ramans@infodiginet:~$ hostnamectl
      Static hostname: infodiginet
            Icon name: computer-vm
              Chassis: vm
           Machine ID: 52a41aeb86f748099e84d9f42db2dc61
              Boot ID: 7bdcf8acb2774487bdf2959dbf3e5900
       Virtualization: vmware
     Operating System: Ubuntu 20.04 LTS
               Kernel: Linux 5.15.0-53-generic
         Architecture: x86-64
- An ordinary system user with sudo privilege
- Java 11 installed on the system
ramans@infodiginet:~$ java --version
openjdk 11.0.17 2022-10-18
OpenJDK Runtime Environment (build 11.0.17+8-post-Ubuntu-1ubuntu222.04)
OpenJDK 64-Bit Server VM (build 11.0.17+8-post-Ubuntu-1ubuntu222.04, mixed mode, sharing)
The Elasticsearch installation process that will be carried out in this tutorial is as follows:
- Adding Elasticsearch GPG key
- Adding Elasticsearch Debian repository
- Run system update
- Install Elasticsearch on Ubuntu 20.04 LTS
- Enable and Start Elasticsearch Service
- Verify Elasticsearch is working properly
The detailed tasks will be explained in the sub-chapter below.
1. Adding Elasticsearch GPG Key
By default, the Elasticsearch components are not available in Ubuntu package repositories, so we have to add it manually to the source list. For this purpose we will import the Elasticsearch public GPG key by using wget command line, as shown below :
$ wget -qO - https://artifacts.elastic.co/GPG-KEY-elasticsearch | sudo gpg --dearmor -o /usr/share/keyrings/elasticsearch-keyring.gpg
2. Add Elasticsearch Repository
The next step is to save the repository definition to /etc/apt/sources.list.d/elastic-8.x.list by using command line. Before proceeding, we need to install the apt-transport-https first.
$ sudo apt-get install apt-transport-https
$ echo "deb [signed-by=/usr/share/keyrings/elasticsearch-keyring.gpg] https://artifacts.elastic.co/packages/8.x/apt stable main" | sudo tee /etc/apt/sources.list.d/elastic-8.x.list
Output :
ramans@infodiginet:~$ sudo apt-get install apt-transport-https
Reading package lists... Done
Building dependency tree
Reading state information... Done
The following NEW packages will be installed:
  apt-transport-https
0 upgraded, 1 newly installed, 0 to remove and 619 not upgraded.
Need to get 1,704 B of archives.
After this operation, 162 kB of additional disk space will be used.
Get:1 http://us.archive.ubuntu.com/ubuntu focal-updates/universe amd64 apt-transport-https all 2.0.9 [1,704 B]
Fetched 1,704 B in 3s (571 B/s)
Selecting previously unselected package apt-transport-https.
(Reading database ... 178494 files and directories currently installed.)
Preparing to unpack .../apt-transport-https_2.0.9_all.deb ...
Unpacking apt-transport-https (2.0.9) ...
Setting up apt-transport-https (2.0.9) ...
ramans@infodiginet:~$ echo "deb [signed-by=/usr/share/keyrings/elasticsearch-keyring.gpg] https://artifacts.elastic.co/packages/8.x/apt stable main" | sudo tee /etc/apt/sources.list.d/elastic-8.x.list
deb [signed-by=/usr/share/keyrings/elasticsearch-keyring.gpg] https://artifacts.elastic.co/packages/8.x/apt stable main
3. Run System Update
The next step is to update our Ubuntu system package lists so APT will read the new Elastic source, this task will be performed by submitting command line :
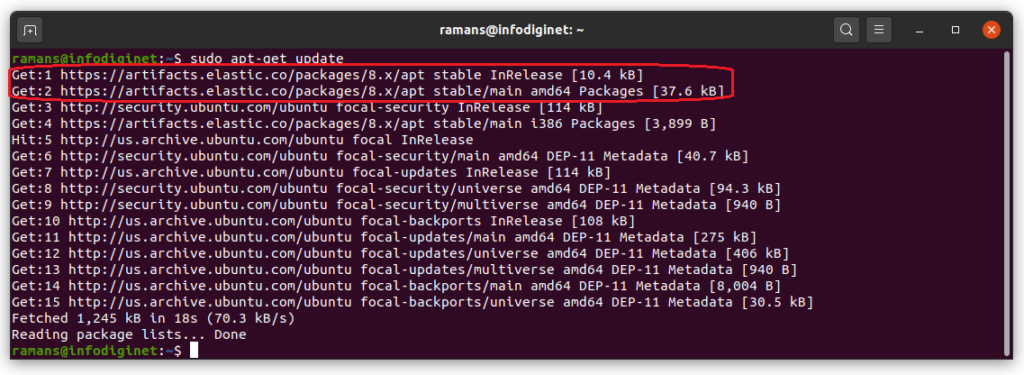
$ sudo apt-get update
Output :
ramans@infodiginet:~$ sudo apt-get update
Get:1 https://artifacts.elastic.co/packages/8.x/apt stable InRelease [10.4 kB]
Get:2 https://artifacts.elastic.co/packages/8.x/apt stable/main amd64 Packages [37.6 kB]
Get:3 http://security.ubuntu.com/ubuntu focal-security InRelease [114 kB]
Get:4 https://artifacts.elastic.co/packages/8.x/apt stable/main i386 Packages [3,899 B]
Hit:5 http://us.archive.ubuntu.com/ubuntu focal InRelease
Get:6 http://security.ubuntu.com/ubuntu focal-security/main amd64 DEP-11 Metadata [40.7 kB]
Get:7 http://us.archive.ubuntu.com/ubuntu focal-updates InRelease [114 kB]
Get:8 http://security.ubuntu.com/ubuntu focal-security/universe amd64 DEP-11 Metadata [94.3 kB]
Get:9 http://security.ubuntu.com/ubuntu focal-security/multiverse amd64 DEP-11 Metadata [940 B]
Get:10 http://us.archive.ubuntu.com/ubuntu focal-backports InRelease [108 kB]
Get:11 http://us.archive.ubuntu.com/ubuntu focal-updates/main amd64 DEP-11 Metadata [275 kB]
Get:12 http://us.archive.ubuntu.com/ubuntu focal-updates/universe amd64 DEP-11 Metadata [406 kB]
Get:13 http://us.archive.ubuntu.com/ubuntu focal-updates/multiverse amd64 DEP-11 Metadata [940 B]
Get:14 http://us.archive.ubuntu.com/ubuntu focal-backports/main amd64 DEP-11 Metadata [8,004 B]
Get:15 http://us.archive.ubuntu.com/ubuntu focal-backports/universe amd64 DEP-11 Metadata [30.5 kB]
Fetched 1,245 kB in 18s (70.3 kB/s)
Reading package lists... Done
4. Install Elasticsearch on Ubuntu 20.04 LTS
After all are set, then install Elasticsearch by using command line :
$ sudo apt-get install elasticsearch
Output :
ramans@infodiginet:~$ sudo apt-get install elasticsearch
Reading package lists... Done
Building dependency tree
Reading state information... Done
The following NEW packages will be installed:
  elasticsearch
0 upgraded, 1 newly installed, 0 to remove and 619 not upgraded.
Need to get 581 MB of archives.
After this operation, 1,194 MB of additional disk space will be used.
Get:1 https://artifacts.elastic.co/packages/8.x/apt stable/main amd64 elasticsearch amd64 8.5.1 [581 MB]
Fetched 581 MB in 8min 54s (1,087 kB/s)
Selecting previously unselected package elasticsearch.
(Reading database ... 178498 files and directories currently installed.)
Preparing to unpack .../elasticsearch_8.5.1_amd64.deb ...
Creating elasticsearch group... OK
Creating elasticsearch user... OK
Unpacking elasticsearch (8.5.1) ...
Setting up elasticsearch (8.5.1) ...
--------------------------- Security autoconfiguration information ------------------------------

Authentication and authorization are enabled.
TLS for the transport and HTTP layers is enabled and configured.

The generated password for the elastic built-in superuser is : wnygf9EaKF_=paRbiscr

If this node should join an existing cluster, you can reconfigure this with
'/usr/share/elasticsearch/bin/elasticsearch-reconfigure-node --enrollment-token <token-here>'
after creating an enrollment token on your existing cluster.

You can complete the following actions at any time:

Reset the password of the elastic built-in superuser with
'/usr/share/elasticsearch/bin/elasticsearch-reset-password -u elastic'.

Generate an enrollment token for Kibana instances with
 '/usr/share/elasticsearch/bin/elasticsearch-create-enrollment-token -s kibana'.

Generate an enrollment token for Elasticsearch nodes with
'/usr/share/elasticsearch/bin/elasticsearch-create-enrollment-token -s node'.

-------------------------------------------------------------------------------------------------
### NOT starting on installation, please execute the following statements to configure elasticsearch service to start automatically using systemd
 sudo systemctl daemon-reload
 sudo systemctl enable elasticsearch.service
### You can start elasticsearch service by executing
 sudo systemctl start elasticsearch.service
5. Enable and Start Elasticsearch Service
By default, after Elasticsearch installed on our system, its service is not started yet. So we have to start its service by using following command lines :
$ sudo systemctl daemon-reload
$ sudo systemctl enable elasticsearch.service
$ sudo systemctl start elasticsearch.service
$ sudo systemctl status elasticsearch.service
Output :
ramans@infodiginet:~$ sudo systemctl daemon-reload
[sudo] password for ramans:
ramans@infodiginet:~$ sudo systemctl enable elasticsearch.service
Created symlink /etc/systemd/system/multi-user.target.wants/elasticsearch.service → /lib/systemd/system/elasticsearch.service.
ramans@infodiginet:~$ sudo systemctl start elasticsearch.service
ramans@infodiginet:~$ sudo systemctl status elasticsearch.service
● elasticsearch.service - Elasticsearch
     Loaded: loaded (/lib/systemd/system/elasticsearch.service; enabled; vendor preset: enabled)
     Active: active (running) since Tue 2022-11-15 23:42:22 PST; 9s ago
       Docs: https://www.elastic.co
   Main PID: 9401 (java)
      Tasks: 82 (limit: 4585)
     Memory: 2.3G
     CGroup: /system.slice/elasticsearch.service
             ├─9401 /usr/share/elasticsearch/jdk/bin/java -Xms4m -Xmx64m -XX:+UseSerialGC -Dcli.name=server -Dcli.script=>
             ├─9460 /usr/share/elasticsearch/jdk/bin/java -Des.networkaddress.cache.ttl=60 -Des.networkaddress.cache.nega>
             └─9481 /usr/share/elasticsearch/modules/x-pack-ml/platform/linux-x86_64/bin/controller

Nov 15 23:42:06 infodiginet systemd[1]: Starting Elasticsearch...
Nov 15 23:42:22 infodiginet systemd[1]: Started Elasticsearch.
6. Verify Elasticsearch
Until this point, the Elasticsearch is now has been installed on the system and ready to be configured. To verify it we will use a simple command line as follow:
$ curl -X GET "localhost:9200"
Output :
ramans@infodiginet:~$ curl -X GET "localhost:9200"
{
"name" : "infodiginet",
"cluster_name" : "elasticsearch",
"cluster_uuid" : "KDhbln6KTiyXUKddJ6gWeg",
"version" : {
"number" : "8.5.1",
"build_flavor" : "default",
"build_type" : "deb",
"build_hash" : "c1310c45fc534583afe2c1c03046491efba2bba2",
"build_date" : "2022-11-09T21:02:20.169855900Z",
"build_snapshot" : false,
"lucene_version" : "9.4.1",
"minimum_wire_compatibility_version" : "7.17.0",
"minimum_index_compatibility_version" : "7.0.0"
},
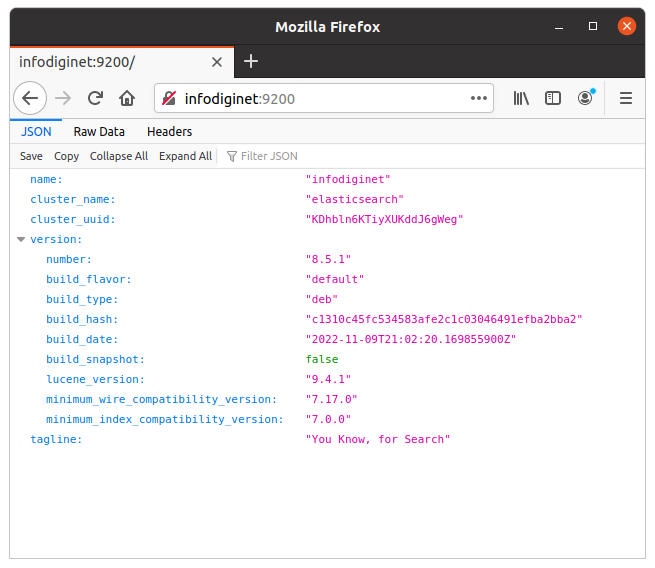
"tagline" : "You Know, for Search"
}
we can also open via browser as shown below.
Configuring Elasticsearch
After the Elasticsearch installation process is complete, the next step it to configure Elasticsearch so the application will be fits with our needs. Elasticsearch has three configuration files:
- elasticsearch.yml for configuring Elasticsearch
- jvm.options for configuring Elasticsearch JVM settings
- log4j2.properties for configuring Elasticsearch logging
In this tutorial, we will only discuss the elasticsearch.yml file because the elasticsearch.yml contains configuration options for cluster, node, paths, memory, network, discovery, and gateway. Most of these options are preconfigured in the file but we can change them according to our needs. Since this tutorial is intended for single-server configuration, we will only adjust the settings for the network host.
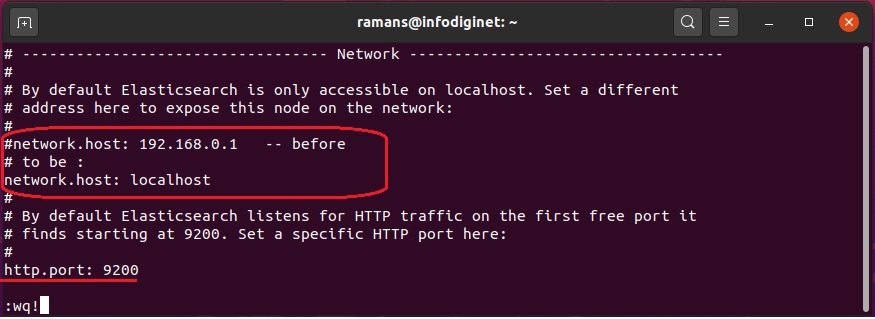
On our case, we will restrict an access to our Elasticsearch application and therefore increase security, find the line that specifies network.host, uncomment it, and replace its value with localhost so it wiil be like this.
# ---------------------------------- Network -----------------------------------
#
# By default Elasticsearch is only accessible on localhost. Set a different
# address here to expose this node on the network:
#
network.host: localhost
#
# By default Elasticsearch listens for HTTP traffic on the first free port it
# finds starting at 9200. Set a specific HTTP port here:
#
http.port: 9200
After the configuration changes are made, we have to reload the daemon and restart the Elasticsearch service with the command line:
ramans@infodiginet:~$ sudo systemctl daemon-reload
[sudo] password for ramans:
ramans@infodiginet:~$ sudo systemctl restart elasticsearch
ramans@infodiginet:~$ sudo systemctl start elasticsearch
ramans@infodiginet:~$ sudo systemctl status elasticsearch
● elasticsearch.service - Elasticsearch
     Loaded: loaded (/lib/systemd/system/elasticsearch.service; enabled; vendor preset: enable>
     Active: active (running) since Wed 2022-11-16 20:38:05 PST; 10s ago
       Docs: https://www.elastic.co
   Main PID: 72062 (java)
      Tasks: 81 (limit: 4585)
     Memory: 2.3G
     CGroup: /system.slice/elasticsearch.service
             ├─72062 /usr/share/elasticsearch/jdk/bin/java -Xms4m -Xmx64m -XX:+UseSerialGC -Dc>
             ├─72200 /usr/share/elasticsearch/jdk/bin/java -Des.networkaddress.cache.ttl=60 -D>
             └─72311 /usr/share/elasticsearch/modules/x-pack-ml/platform/linux-x86_64/bin/cont>

Nov 16 20:37:19 infodiginet systemd[1]: Starting Elasticsearch...
Nov 16 20:38:05 infodiginet systemd[1]: Started Elasticsearch.
Using Elasticsearch
In this section, we will try to use Elasticsearch. In managing data, Elasticsearch uses RESTful API which responds to the CRUD commands: create, read, update, and delete. we’ll try some simple commands that will illustrate the functionality of Elasticsearch.
Creating an Index
An index is like a ‘database’ in a relational database. It has a mapping which defines multiple types.
An index is a logical namespace which maps to one or more primary shards and can have zero or more replica shards.
View an Index
Before creating a new index, we will first take a look at the list of indexes that have been formed on the system by using GET _cat/indices?v request.
$ curl localhost:9200/_cat/indices?v
Output :
ramans@infodiginet:~$ curl localhost:9200/_cat/indices?v
health status index uuid pri rep docs.count docs.deleted store.size pri.store.size
From the request above, apparently there is no index created in the system.
Create an Index
To create an index, we will make a request as follows.
$ curl -X PUT localhost:9200/ramans_index?pretty
{
  "acknowledged" : true,
  "shards_acknowledged" : true,
  "index" : "ramans_index"
}
Output :
amans@infodiginet:~$ curl -X PUT localhost:9200/ramans_index?pretty
{
  "acknowledged" : true,
  "shards_acknowledged" : true,
  "index" : "ramans_index"
}
and run the query again.
amans@infodiginet:~$ curl localhost:9200/_cat/indices?v
health status index        uuid                   pri rep docs.count docs.deleted store.size pri.store.size
yellow open   ramans_index Kwql40itRjKMMe_cXBPNpw   1   1          0            0       225b           225b
ramans@infodiginet:~$ curl localhost:9200/ramans_index?pretty
{
  "ramans_index" : {
    "aliases" : { },
    "mappings" : { },
    "settings" : {
      "index" : {
        "routing" : {
          "allocation" : {
            "include" : {
              "_tier_preference" : "data_content"
            }
          }
        },
        "number_of_shards" : "1",
        "provided_name" : "ramans_index",
        "creation_date" : "1668662581387",
        "number_of_replicas" : "1",
        "uuid" : "Kwql40itRjKMMe_cXBPNpw",
        "version" : {
          "created" : "8050199"
        }
      }
    }
  }
}
Conclusion
In this short tutorial, we have installed, configured, and tried to use Elasticsearch. I hope this tutorial will be helpfu.