In this short tutorial we will discuss how to install Nginx on Ubuntu 22.04 LTS operating system. Nginx is an open source web server, one of the most popular and high performing web server. Nginx serves multiple purposes such as email proxy server, reverse and forward proxy server, media streaming, load balancing, and so on. In this tutorial we will use Nginx version 1.18.0 to be installed on Ubuntu 22.04 LTS operating system.
Installing Nginx on Ubuntu 22.04
Nginx is available in Ubuntu’s default repositories, so we will install it from the repositories using the apt packaging system. We will update our local package index so that we have access to the most recent package listings on our Ubunt 22.04 system.
Prerequisites
Before we start to install Nginx 1.8 on Ubuntu 22.o4 LTS operating system, there are several prerequisites that must be met so that the installation process can run smoothly. We will need to prepare any requirements as mention below :
- an Ubuntu 22.04 server system
ramans@infodiginet:~$ hostnamectl
Static hostname: infodiginet
Icon name: computer-vm
Chassis: vm
Machine ID: c05bdac4b09048309a26b6024adee484
Boot ID: ba10ca2fa4c348bc816932582a0222ad
Virtualization: vmware
Operating System: Ubuntu 22.04.1 LTS
Kernel: Linux 6.0.0-060000-generic
Architecture: x86-64
- a non-root user with sudo privileges
- sufficient disk and good internet access
The Nginx installation process will be explained in this tutorial are as follows:
- Update System
- Install Nginx on Ubuntu 22.04
- Verify Nginx installation
- Configuring firewall
- Testing Nginx
1. Update Ubuntu 22.04 System
The first step to be taken in Nginx installation is to update local packages repository. This task will cut down the installation time and it also helps prevent zero-day exploits against outdated software, for this purpose we will submit the command line :
$ sudo apt update
$ sudo apt upgrade
2. Install Nginx On Ubuntu 22.04
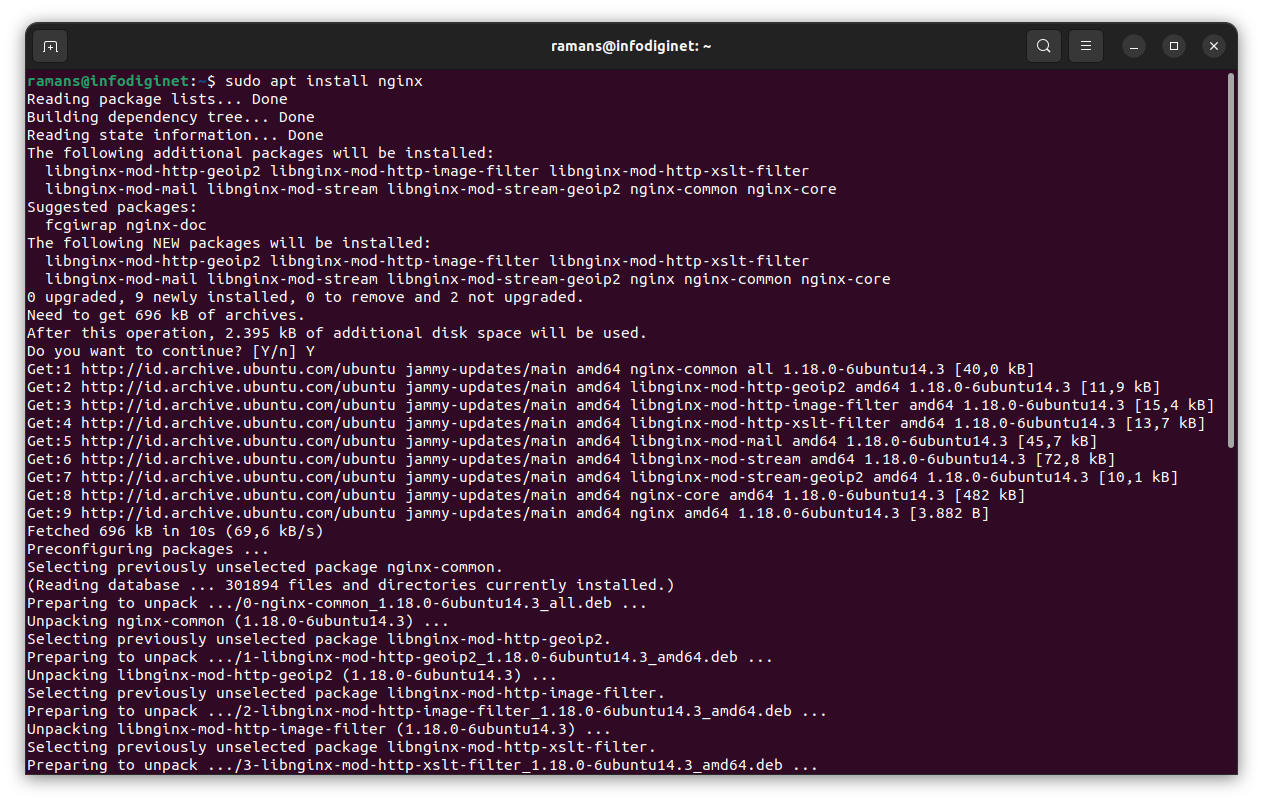
In this step, we will install Nginx by using APT, by submitting command line :
$ sudo apt install nginx
Output :
ramans@infodiginet:~$ sudo apt install nginx
Reading package lists... Done
Building dependency tree... Done
Reading state information... Done
The following additional packages will be installed:
libnginx-mod-http-geoip2 libnginx-mod-http-image-filter libnginx-mod-http-xslt-filter
libnginx-mod-mail libnginx-mod-stream libnginx-mod-stream-geoip2 nginx-common nginx-core
Suggested packages:
fcgiwrap nginx-doc
The following NEW packages will be installed:
libnginx-mod-http-geoip2 libnginx-mod-http-image-filter libnginx-mod-http-xslt-filter
libnginx-mod-mail libnginx-mod-stream libnginx-mod-stream-geoip2 nginx nginx-common nginx-core
0 upgraded, 9 newly installed, 0 to remove and 2 not upgraded.
Need to get 696 kB of archives.
After this operation, 2.395 kB of additional disk space will be used.
Do you want to continue? [Y/n] Y
Get:1 http://id.archive.ubuntu.com/ubuntu jammy-updates/main amd64 nginx-common all 1.18.0-6ubuntu14.3 [40,0 kB]
Get:2 http://id.archive.ubuntu.com/ubuntu jammy-updates/main amd64 libnginx-mod-http-geoip2 amd64 1.18.0-6ubuntu14.3 [11,9 kB]
Get:3 http://id.archive.ubuntu.com/ubuntu jammy-updates/main amd64 libnginx-mod-http-image-filter amd64 1.18.0-6ubuntu14.3 [15,4 kB]
Get:4 http://id.archive.ubuntu.com/ubuntu jammy-updates/main amd64 libnginx-mod-http-xslt-filter amd64 1.18.0-6ubuntu14.3 [13,7 kB]
Get:5 http://id.archive.ubuntu.com/ubuntu jammy-updates/main amd64 libnginx-mod-mail amd64 1.18.0-6ubuntu14.3 [45,7 kB]
Get:6 http://id.archive.ubuntu.com/ubuntu jammy-updates/main amd64 libnginx-mod-stream amd64 1.18.0-6ubuntu14.3 [72,8 kB]
Get:7 http://id.archive.ubuntu.com/ubuntu jammy-updates/main amd64 libnginx-mod-stream-geoip2 amd64 1.18.0-6ubuntu14.3 [10,1 kB]
Get:8 http://id.archive.ubuntu.com/ubuntu jammy-updates/main amd64 nginx-core amd64 1.18.0-6ubuntu14.3 [482 kB]
Get:9 http://id.archive.ubuntu.com/ubuntu jammy-updates/main amd64 nginx amd64 1.18.0-6ubuntu14.3 [3.882 B]
Fetched 696 kB in 10s (69,6 kB/s)
Preconfiguring packages ...
Selecting previously unselected package nginx-common.
(Reading database ... 301894 files and directories currently installed.)
Preparing to unpack .../0-nginx-common_1.18.0-6ubuntu14.3_all.deb ...
Unpacking nginx-common (1.18.0-6ubuntu14.3) ...
Selecting previously unselected package libnginx-mod-http-geoip2.
Preparing to unpack .../1-libnginx-mod-http-geoip2_1.18.0-6ubuntu14.3_amd64.deb ...
Unpacking libnginx-mod-http-geoip2 (1.18.0-6ubuntu14.3) ...
Selecting previously unselected package libnginx-mod-http-image-filter.
Preparing to unpack .../2-libnginx-mod-http-image-filter_1.18.0-6ubuntu14.3_amd64.deb ...
Unpacking libnginx-mod-http-image-filter (1.18.0-6ubuntu14.3) ...
Selecting previously unselected package libnginx-mod-http-xslt-filter.
Preparing to unpack .../3-libnginx-mod-http-xslt-filter_1.18.0-6ubuntu14.3_amd64.deb ...
Unpacking libnginx-mod-http-xslt-filter (1.18.0-6ubuntu14.3) ...
Selecting previously unselected package libnginx-mod-mail.
Preparing to unpack .../4-libnginx-mod-mail_1.18.0-6ubuntu14.3_amd64.deb ...
Unpacking libnginx-mod-mail (1.18.0-6ubuntu14.3) ...
Selecting previously unselected package libnginx-mod-stream.
Preparing to unpack .../5-libnginx-mod-stream_1.18.0-6ubuntu14.3_amd64.deb ...
Unpacking libnginx-mod-stream (1.18.0-6ubuntu14.3) ...
Selecting previously unselected package libnginx-mod-stream-geoip2.
Preparing to unpack .../6-libnginx-mod-stream-geoip2_1.18.0-6ubuntu14.3_amd64.deb ...
Unpacking libnginx-mod-stream-geoip2 (1.18.0-6ubuntu14.3) ...
Selecting previously unselected package nginx-core.
Preparing to unpack .../7-nginx-core_1.18.0-6ubuntu14.3_amd64.deb ...
Unpacking nginx-core (1.18.0-6ubuntu14.3) ...
Selecting previously unselected package nginx.
Preparing to unpack .../8-nginx_1.18.0-6ubuntu14.3_amd64.deb ...
Unpacking nginx (1.18.0-6ubuntu14.3) ...
Setting up nginx-common (1.18.0-6ubuntu14.3) ...
Created symlink /etc/systemd/system/multi-user.target.wants/nginx.service → /lib/systemd/system/nginx.service.
Could not execute systemctl: at /usr/bin/deb-systemd-invoke line 142.
Setting up libnginx-mod-http-xslt-filter (1.18.0-6ubuntu14.3) ...
Setting up libnginx-mod-http-geoip2 (1.18.0-6ubuntu14.3) ...
Setting up libnginx-mod-mail (1.18.0-6ubuntu14.3) ...
Setting up libnginx-mod-http-image-filter (1.18.0-6ubuntu14.3) ...
Setting up libnginx-mod-stream (1.18.0-6ubuntu14.3) ...
Setting up libnginx-mod-stream-geoip2 (1.18.0-6ubuntu14.3) ...
Setting up nginx-core (1.18.0-6ubuntu14.3) ...
Not attempting to start NGINX, port 80 is already in use.
Setting up nginx (1.18.0-6ubuntu14.3) ...
Processing triggers for man-db (2.10.2-1) ...
Processing triggers for ufw (0.36.1-4build1) ...
3. Verify Nginx Installation
After installation is completed, then we will verify its version by texting command line :
$ nginx -v
Output :
ramans@infodiginet:~$ nginx -v
nginx version: nginx/1.18.0 (Ubuntu)
By default, Nginx service is started after installation is completed done. We can check it with the following command line:
$ sudo systemctl status nginx
Output :
ramans@infodiginet:~$ sudo systemctl status nginx
● nginx.service - A high performance web server and a reverse proxy server
Loaded: loaded (/lib/systemd/system/nginx.service; enabled; vendor preset: enabled)
Active: active (running) since Mon 2023-01-02 15:52:09 WIB; 19s ago
Docs: man:nginx(8)
Process: 26833 ExecStartPre=/usr/sbin/nginx -t -q -g daemon on; master_process on; (code=exited, status=0/SUCCESS)
Process: 26834 ExecStart=/usr/sbin/nginx -g daemon on; master_process on; (code=exited, status=0/SUCCESS)
Main PID: 26835 (nginx)
Tasks: 3 (limit: 9408)
Memory: 4.8M
CPU: 33ms
CGroup: /system.slice/nginx.service
├─26835 "nginx: master process /usr/sbin/nginx -g daemon on; master_process on;"
├─26836 "nginx: worker process" "" "" "" "" "" "" "" "" "" "" "" "" "" "" "" "" "" "" "" "" "" "" "" "" "" "" ""
└─26837 "nginx: worker process" "" "" "" "" "" "" "" "" "" "" "" "" "" "" "" "" "" "" "" "" "" "" "" "" "" "" ""

Jan 02 15:52:09 infodiginet systemd[1]: Starting A high performance web server and a reverse proxy server...
Jan 02 15:52:09 infodiginet systemd[1]: Started A high performance web server and a reverse proxy server.
To make Nginx service starting at the startup of the system automatically, we can set it by submitting command line :
$ sudo systemctl enable nginx
Output :
ramans@infodiginet:~$ sudo systemctl enable nginx
Synchronizing state of nginx.service with SysV service script with /lib/systemd/systemd-sysv-install.
Executing: /lib/systemd/systemd-sysv-install enable nginx
Created symlink /etc/systemd/system/multi-user.target.wants/nginx.service → /lib/systemd/system/nginx.service.
4. Configuring Firewall
At this step, we will configure the firewall to allow traffic on HTTP port 80 and HTTP port 443. Before that is done we will list all the application that ufw noticed. For this purpose we will submit the following command line :
$ sudo ufw app list
Output :
ramans@infodiginet:~$ sudo ufw app list
Available applications:
Nginx Full
Nginx HTTP
Nginx HTTPS
OpenSSH
To allow traffic on HTTP port 80 and HTTP port 443, we use the following command :
$ sudo ufw allow 'Nginx full'
Ouput :
ramans@infodiginet:~$ sudo ufw allow 'Nginx full'
Skipping adding existing rule
Skipping adding existing rule (v6)
Then reload the firewall to get the effect after the change, by texting following command line :
$ sudo ufw reload
Output :
ramans@infodiginet:~$ sudo ufw reload
Firewall reloaded
5. Testing Nginx Installation
At this point, we have reached the last step, we will test our Nginx by using web browser and by using curl command line.
1. Using web browser.
We can check Nginx is running and ready to serve by hit the url : http://server_ipaddress_or_hostname.

2. Using curl command line.
We will use curl command line to check if Nginx service is running or not, by submitting command line :
$ curl -i infodiginet
Output :
ramans@infodiginet:~$ curl -i infodiginet
HTTP/1.1 200 OK
Server: nginx/1.18.0 (Ubuntu)
Date: Mon, 02 Jan 2023 10:14:57 GMT
Content-Type: text/html
Content-Length: 612
Last-Modified: Mon, 02 Jan 2023 07:21:35 GMT
Connection: keep-alive
ETag: "63b285ff-264"
Accept-Ranges: bytes
Conclusion
In this tutorial we have learned how to install NginX on Ubuntu 22.04 LTS operating system.