On this short tutorial, we will learn how to install Nessus vulnerability scanner Professional edition on Ubuntu 22.04 LTS operating system.
Introduction
In today’s interconnected world, ensuring the security of digital assets and data is paramount. Organizations and individuals need to be proactive in identifying potential vulnerabilities in their systems to prevent security breaches and data breaches. Nessus, a widely-used vulnerability assessment tool, provides a comprehensive solution to scan and identify security weaknesses within networks, systems, and applications. In this article, we will explore what Nessus is, its key features, and how it benefits organizations in securing their infrastructure.
What is Nessus?
Nessus is a popular vulnerability scanner developed by Tenable Network Security. It is designed to help organizations proactively assess, manage, and remediate security risks. Nessus conducts comprehensive security assessments by scanning networks, servers, applications, and other devices for potential vulnerabilities, misconfigurations, and threats.
Installing Nessus Scanner on Ubuntu 22.04 LTS server
Installing Nessus on Ubuntu is a straightforward process. Follow these steps to get Nessus up and running on the system.
Step 1: Download Nessus Package
Step 2: Install Nessus
Step 3: Start And Enable Nessus Service
Step 4: Allow Nessus Port
Step 5: Access Nessus Web Interface
Step 6: Star Scanning
Step 1: Download Nessus Package
Nessus scanner is available on Deb binary file. The first step to install it is to download the package to our system. On this tutorial, we will use the Nessus version 10.5.3 for Ubuntu which is the latest stable available version when this article is created. We will download it, by using curl command as shown below :
$ curl --request GET \
--url 'https://www.tenable.com/downloads/api/v2/pages/nessus/files/Nessus-10.5.3-ubuntu1404_amd64.deb' \
--output 'Nessus-10.5.3-ubuntu1404_amd64.deb'
The output will be as shown below :
ramans@infodiginet:~$ curl --request GET \
  --url 'https://www.tenable.com/downloads/api/v2/pages/nessus/files/Nessus-10.5.3-ubuntu1404_amd64.deb' \
  --output 'Nessus-10.5.3-ubuntu1404_amd64.deb'
  % Total    % Received % Xferd  Average Speed   Time    Time     Time  Current
                                 Dload  Upload   Total   Spent    Left  Speed
100 62.4M    0 62.4M    0     0  2134k      0 --:--:--  0:00:29 --:--:-- 2263k
Step 2: Install Nessus
Next, use the gdebi tool to install the Nessus package. Gdebi will automatically handle dependencies for you. Run the following command:
$ sudo dpkg -i Nessus-10.5.3-ubuntu1404_amd64.deb
Output will be as shown below :
ramans@infodiginet:~$ sudo dpkg -i Nessus-10.5.3-ubuntu1404_amd64.deb
[sudo] password for ramans:
Selecting previously unselected package nessus.
(Reading database ... 291158 files and directories currently installed.)
Preparing to unpack Nessus-10.5.3-ubuntu1404_amd64.deb ...
Unpacking nessus (10.5.3) ...
Setting up nessus (10.5.3) ...
HMAC : (Module_Integrity) : Pass
SHA1 : (KAT_Digest) : Pass
SHA2 : (KAT_Digest) : Pass
SHA3 : (KAT_Digest) : Pass
TDES : (KAT_Cipher) : Pass
AES_GCM : (KAT_Cipher) : Pass
AES_ECB_Decrypt : (KAT_Cipher) : Pass
RSA : (KAT_Signature) : RNG : (Continuous_RNG_Test) : Pass
Pass
ECDSA : (PCT_Signature) : Pass
ECDSA : (PCT_Signature) : Pass
DSA : (PCT_Signature) : Pass
TLS13_KDF_EXTRACT : (KAT_KDF) : Pass
TLS13_KDF_EXPAND : (KAT_KDF) : Pass
TLS12_PRF : (KAT_KDF) : Pass
PBKDF2 : (KAT_KDF) : Pass
SSHKDF : (KAT_KDF) : Pass
KBKDF : (KAT_KDF) : Pass
HKDF : (KAT_KDF) : Pass
SSKDF : (KAT_KDF) : Pass
X963KDF : (KAT_KDF) : Pass
X942KDF : (KAT_KDF) : Pass
HASH : (DRBG) : Pass
CTR : (DRBG) : Pass
HMAC : (DRBG) : Pass
DH : (KAT_KA) : Pass
ECDH : (KAT_KA) : Pass
RSA_Encrypt : (KAT_AsymmetricCipher) : Pass
RSA_Decrypt : (KAT_AsymmetricCipher) : Pass
RSA_Decrypt : (KAT_AsymmetricCipher) : Pass
INSTALL PASSED
Unpacking Nessus Scanner Core Components...
Created symlink /etc/systemd/system/nessusd.service → /lib/systemd/system/nessusd.service.
Created symlink /etc/systemd/system/multi-user.target.wants/nessusd.service → /lib/systemd/system/nessusd.service.

 - You can start Nessus Scanner by typing /bin/systemctl start nessusd.service
 - Then go to https://infodiginet:8834/ to configure your scanner
Step 3: Start And Enable Nessus Service
After the installation is complete, start and enable the Nessus service with the following commands :
$ sudo systemctl start nessusd
$ sudo systemctl enable nessusd
$ sudo systemctl status nessusd
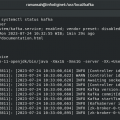
The output will be as shown below :
ramans@infodiginet:~$ sudo systemctl start nessusd
ramans@infodiginet:~$ sudo systemctl enable nessusd
ramans@infodiginet:~$ sudo systemctl status nessusd
● nessusd.service - The Nessus Vulnerability Scanner
Loaded: loaded (/lib/systemd/system/nessusd.service; enabled; vendor preset: enabled)
Active: active (running) since Wed 2023-07-19 07:14:47 WIB; 30s ago
Main PID: 12307 (nessus-service)
Tasks: 14 (limit: 9406)
Memory: 82.1M
CPU: 27.936s
CGroup: /system.slice/nessusd.service
├─12307 /opt/nessus/sbin/nessus-service -q
└─12308 nessusd -q
Jul 19 07:14:47 infodiginet systemd[1]: Started The Nessus Vulnerability Scanner.
Jul 19 07:14:48 infodiginet nessus-service[12308]: Cached 0 plugin libs in 0msec
Jul 19 07:14:48 infodiginet nessus-service[12308]: Cached 0 plugin libs in 0mse
Step 4: Allow Nessus Port
The Nessus is running on port 8834, thus to access its web interface remotely using the browser, we need to open this port in our Ubuntu 22.04 firewall. Make sure this port is allowed on firewall if UFW is running:
$ sudo ufw allow 8834/tcp
$ sudo ufw status
The output will be shown below :
ramans@infodiginet:~$ sudo ufw allow "OpenSSH"
Rule added
Rule added (v6)
ramans@infodiginet:~$ sudo ufw allow 8834/tcp
Rule added
Rule added (v6)
ramans@infodiginet:~$ sudo ufw enable
Firewall is active and enabled on system startup
ramans@infodiginet:~$ sudo ufw status
Status: active

To                         Action      From
--                         ------      ----
Apache                     ALLOW       Anywhere
Nginx Full                 ALLOW       Anywhere
8080                       ALLOW       Anywhere
OpenSSH                    ALLOW       Anywhere
8834/tcp                   ALLOW       Anywhere
Apache (v6)                ALLOW       Anywhere (v6)
Nginx Full (v6)            ALLOW       Anywhere (v6)
8080 (v6)                  ALLOW       Anywhere (v6)
OpenSSH (v6)               ALLOW       Anywhere (v6)
8834/tcp (v6)              ALLOW       Anywhere (v6)
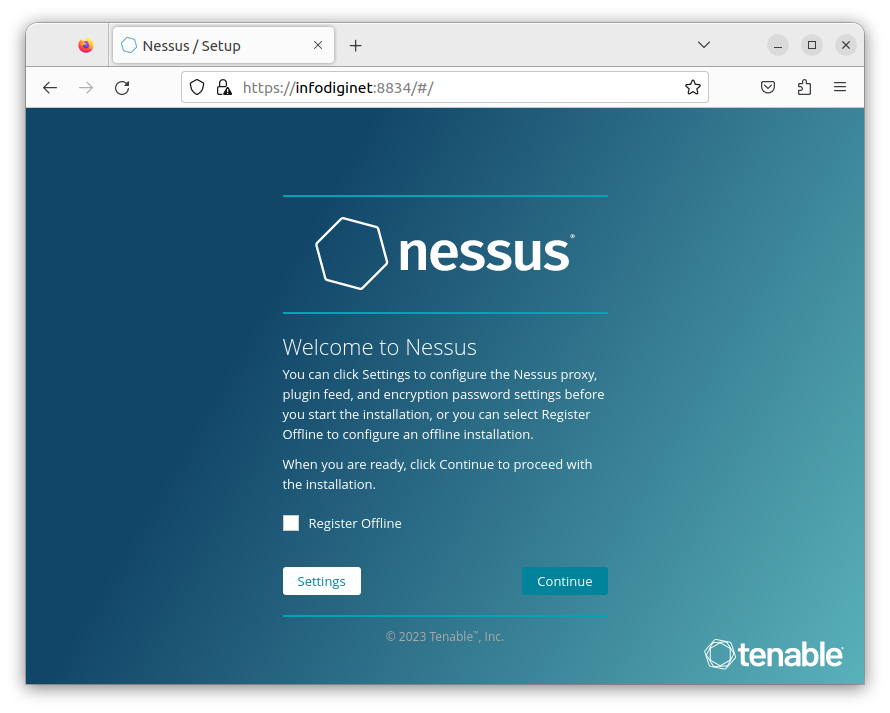
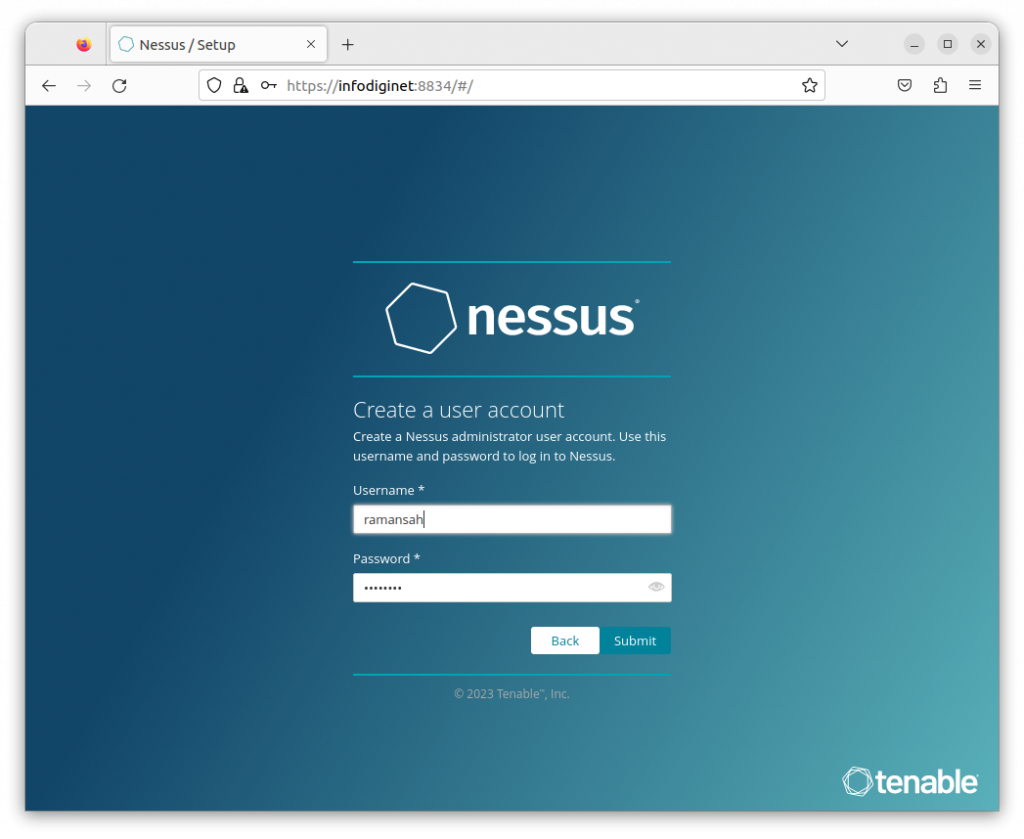
Step 5: Access Nessus Web Interface
To access the Nessus web interface, open your web browser and enter the following URL: https://ipaddress_or_hostname:8334.
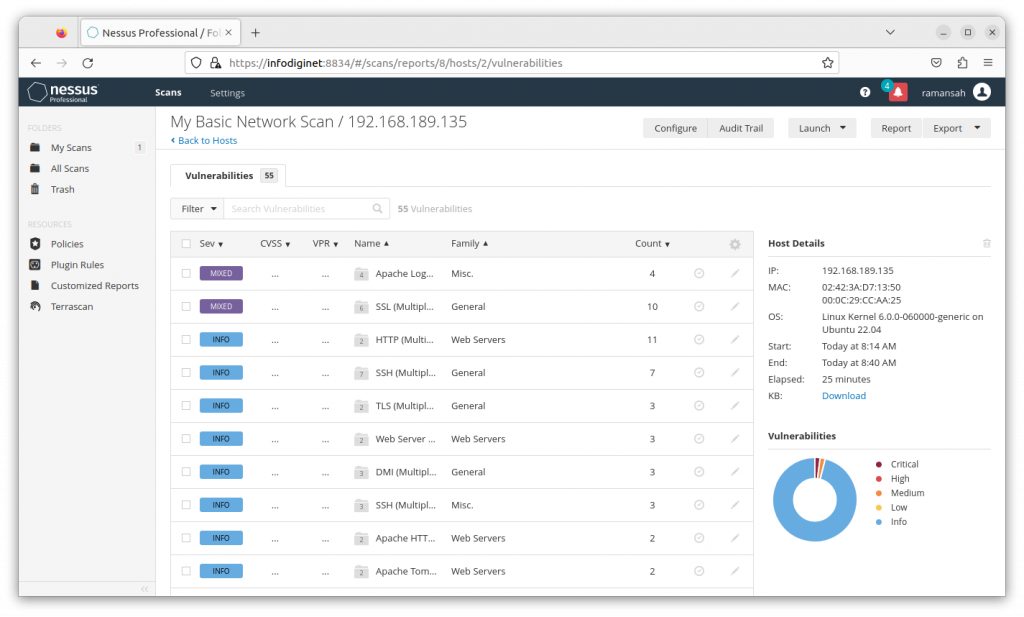
Step 6: Start Scanning
In the next stage we will follow and select the option that suits our needs, there are options: Nessus Essentials, Nessus Professional, Nessus Manager, Nessus Expert. Here’s an example of the selected Nessus Professional view.
Conclusion
By following these steps, we should have successfully installed Nessus on our Ubuntu 22.04 system. Nessus will now help us to identify potential vulnerabilities and security risks, enabling us to take proactive measures to secure our infrastructure and data. Remember to keep Nessus up to date by applying regular updates and patches to ensure optimal security coverage.