In this article we will learn how to install SmartGit on Ubuntu 22.04 LTS operating system. SmartGit: Simplify Your Git Workflow with a Powerful GUI Client.
Introduction
Git has become the de facto version control system for developers and teams collaborating on software projects. While Git’s command-line interface offers great flexibility, some developers prefer a graphical user interface (GUI) to manage their repositories. SmartGit is a powerful Git client that provides an intuitive GUI for seamless version control and collaboration. In this article, we will explore what SmartGit is, its key features, and how it can streamline your Git workflow.
What is SmartGit?
SmartGit is a cross-platform Git client that allows developers to interact with their Git repositories using an easy-to-use GUI. It is designed to simplify the complexities of Git while offering advanced features for both beginners and experienced Git users. SmartGit is available for Windows, macOS, and Linux, making it accessible to a wide range of developers.
Key Features of SmartGit
- Intuitive User Interface: SmartGit’s user-friendly interface makes it easy for developers to navigate and manage their repositories efficiently.
- Git Operations: SmartGit supports all essential Git operations, such as cloning, pulling, pushing, branching, merging, and rebasing.
- Conflict Resolution: The built-in merge tool in SmartGit helps resolve conflicts during merges and rebases with ease.
- Submodule Support: SmartGit fully supports Git submodules, enabling developers to work with projects that use submodules.
- Stash Management: With SmartGit, developers can easily stash and unstash changes to switch between different branches without losing work.
- Remote Repository Interaction: SmartGit allows users to interact with remote repositories, such as GitHub, GitLab, and Bitbucket, simplifying collaboration with distributed teams.
- Integrated SSH Client: SmartGit comes with an integrated SSH client, eliminating the need for external tools to connect to remote repositories securely.
- Cherry Picking: SmartGit provides a simple way to pick specific commits from one branch and apply them to another.
- History and Blame Views: Developers can use SmartGit’s history and blame views to inspect the commit history and track changes made to specific lines of code.
How To Install SmartGit On Ubuntu 22.04
Installing SmartGit on Ubuntu Linux is a straightforward process. There are at least 2 methods for installing SmartGit on Linux (Ubuntu operating system), namely : using APT and download from SmartGit official website. In this tutorial, we will use SmartGit version 22.1.7, this version is the last stable version when this tutorial was created.
1. Installing SmartGit using APT method
Installing SmartGit on Ubuntu 22.04 with APT method will be consist of several steps as described below :
- Update package system
- Install Java
- Adding SmartGit repository
- Install SmartGit
The detail explanation will be described below.
1. Update package system
$ sudo apt update
2. Install Java
SmartGit requires Java to run smoothly on the system, for this purpose we need to install Java and verify it. This step will be done by submitting command line below :
$ sudo apt install default-jdk
$ java --version
Output
ramansah@infodiginet:~$ sudo apt install default-jdk
Reading package lists... Done
Building dependency tree... Done
Reading state information... Done
The following additional packages will be installed:
  ca-certificates-java default-jdk-headless default-jre default-jre-headless fonts-dejavu-extra java-common
  libatk-wrapper-java libatk-wrapper-java-jni libice-dev libpthread-stubs0-dev libsm-dev libx11-dev libxau-dev
  libxcb1-dev libxdmcp-dev libxt-dev openjdk-11-jdk openjdk-11-jdk-headless openjdk-11-jre
  openjdk-11-jre-headless x11proto-dev xorg-sgml-doctools xtrans-dev
Suggested packages:
  libice-doc libsm-doc libx11-doc libxcb-doc libxt-doc openjdk-11-demo openjdk-11-source visualvm
  fonts-ipafont-gothic fonts-ipafont-mincho fonts-wqy-microhei | fonts-wqy-zenhei
The following NEW packages will be installed:
  ca-certificates-java default-jdk default-jdk-headless default-jre default-jre-headless fonts-dejavu-extra
  java-common libatk-wrapper-java libatk-wrapper-java-jni libice-dev libpthread-stubs0-dev libsm-dev
  libx11-dev libxau-dev libxcb1-dev libxdmcp-dev libxt-dev openjdk-11-jdk openjdk-11-jdk-headless
  openjdk-11-jre openjdk-11-jre-headless x11proto-dev xorg-sgml-doctools xtrans-dev
0 upgraded, 24 newly installed, 0 to remove and 145 not upgraded.
Need to get 122 MB of archives.
After this operation, 275 MB of additional disk space will be used.
Do you want to continue? [Y/n] Y
...
update-alternatives: using /usr/lib/jvm/java-11-openjdk-amd64/bin/jconsole to provide /usr/bin/jconsole (jconsole) in auto mode
Setting up libxcb1-dev:amd64 (1.14-3ubuntu3) ...
Setting up libx11-dev:amd64 (2:1.7.5-1ubuntu0.2) ...
Setting up default-jdk (2:1.11-72build2) ...
Setting up libxt-dev:amd64 (1:1.2.1-1) ...
ramansah@infodiginet:~$ java --version
openjdk 11.0.19 2023-04-18
OpenJDK Runtime Environment (build 11.0.19+7-post-Ubuntu-0ubuntu122.04.1)
OpenJDK 64-Bit Server VM (build 11.0.19+7-post-Ubuntu-0ubuntu122.04.1, mixed mode, sharing)
3. Adding SmartGit repository
By default, SmartGit package is not available on Ubuntu base repository. So we need install it via importing PPA repository as follows:
$ sudo add-apt-repository ppa:eugenesan/ppa
Output is as shown below :
ramansah@infodiginet:~$ sudo add-apt-repository ppa:eugenesan/ppa
Repository: 'deb https://ppa.launchpadcontent.net/eugenesan/ppa/ubuntu/ jammy main'
Description:
This repository contains collection of customized, updated, ported and backported
packages for two last LTS releases and latest pre-LTS release.
Packages for older releases relocated to ppa:eugenesan/archive or deleted.
+-------------------------------------------------------------------------------------+
| Disclaimer:
+-------------------------------------------------------------------------------------+
- Packages in this a nd related PPAs are for personal use only.
They developed specifically for several custom environments and may not work for you. - Usage of packages in this PPA, in some forms, might contradict licenses of software
packaged in this and related PPAs. End users and administrator are responsible for
runtime licensing and possible legal consequences. - Some packages provided with their dependencies while some might require additional
Ubuntu repositories and external PPAs. Below is the list of
. . .
Get:5 https://ppa.launchpadcontent.net/eugenesan/ppa/ubuntu jammy InRelease [17,5 kB]
Get:6 https://ppa.launchpadcontent.net/eugenesan/ppa/ubuntu jammy/main i386 Packages [2.356 B]
Get:7 https://ppa.launchpadcontent.net/eugenesan/ppa/ubuntu jammy/main amd64 Packages [6.416 B]
Get:8 https://ppa.launchpadcontent.net/eugenesan/ppa/ubuntu jammy/main Translation-en [4.392 B]
Fetched 30,7 kB in 5s (5.781 B/s)
Reading package lists... Done
4. Installing SmarGit
On this step we will install SmartGit by submitting command line :
$ sudo apt install smartgit
Output will be shown below :
ramansah@infodiginet:~$ sudo apt install smartgit
Reading package lists... Done
Building dependency tree... Done
Reading state information... Done
The following additional packages will be installed:
  git git-man liberror-perl
Suggested packages:
  git-daemon-run | git-daemon-sysvinit git-doc git-email git-gui gitk gitweb git-cvs git-mediawiki git-svn
The following NEW packages will be installed:
  git git-man liberror-perl smartgit
0 upgraded, 4 newly installed, 0 to remove and 145 not upgraded.
Need to get 29,8 MB of archives.
After this operation, 92,7 MB of additional disk space will be used.
Do you want to continue? [Y/n] Y
. . .
Unpacking smartgit (22.1.3-dfsg-0~eugenesan~jammy1) ...
Setting up liberror-perl (0.17029-1) ...
Setting up git-man (1:2.34.1-1ubuntu1.9) ...
Setting up git (1:2.34.1-1ubuntu1.9) ...
Setting up smartgit (22.1.3-dfsg-0~eugenesan~jammy1) ...
Processing triggers for hicolor-icon-theme (0.17-2) ...
Processing triggers for gnome-menus (3.36.0-1ubuntu3) ...
Processing triggers for man-db (2.10.2-1) ...
Processing triggers for mailcap (3.70+nmu1ubuntu1) ...
Processing triggers for desktop-file-utils (0.26-1ubuntu3) ...
5. Launching SmartGit
The last step is to launch SmartGit by submitting command line :
$ smartgit
Output will be as shown below :
ramansah@infodiginet:/$ smartgit
/usr/bin/which
If you experience strange GUI bugs or crashes, try setting GTK_THEME=Adwaita.
2. Installing SmartGit by Downloading Source File
SmartGit provides a Linux version that you can download and install on your system. Here are the steps to install SmartGit on Ubuntu 22.04.
Step 1: Download SmartGit
Visit the SmartGit website (https://www.syntevo.com/smartgit/) and navigate to the “Downloads” section. Download the Linux version of SmartGit appropriate for your system architecture (32-bit or 64-bit) also we can download it by using wget command line.
$ wget https://www.syntevo.com/downloads/smartgit/smartgit-linux-22_1_7.tar.gz
The output will be as shown below :
ramansah@infodiginet:~$ wget https://www.syntevo.com/downloads/smartgit/smartgit-linux-22_1_7.tar.gz
--2023-07-28 20:31:16--  https://www.syntevo.com/downloads/smartgit/smartgit-linux-22_1_7.tar.gz
Resolving www.syntevo.com (www.syntevo.com)... 104.26.6.200, 104.26.7.200, 172.67.72.128, ...
Connecting to www.syntevo.com (www.syntevo.com)|104.26.6.200|:443... connected.
HTTP request sent, awaiting response... 200 OK
Length: 104566745 (100M) [application/x-gzip]
Saving to: ‘smartgit-linux-22_1_7.tar.gz’

smartgit-linux-22_1_7.tar.gz       100%[==============================================================>]  99,72M  1,63MB/s    in 65s

2023-07-28 20:32:22 (1,54 MB/s) - ‘smartgit-linux-22_1_7.tar.gz’ saved [104566745/104566745]
Step 2: Extract the SmartGit Archive
Once the download is complete, navigate to the directory where the SmartGit archive was downloaded (usually the “Downloads” folder). Right-click on the archive and select “Extract Here” or use the following command in the terminal:
$ tar -xvzf smartgit-linux-22_1_7.tar.gz
Step 3: Move SmartGit to Installation Directory
After extracting the archive, you will have a directory named “smartgit” containing the SmartGit files. Move this directory to the desired installation location, such as /opt/:
$ sudo mv smartgit /opt/
Step 4: Create a Symbolic Link (Optional)
For easier access to SmartGit from the terminal, you can create a symbolic link in the /usr/local/bin/ directory:
$ sudo ln -s /opt/smartgit/bin/smartgit.sh /usr/local/bin/smartgit
Step 5: Launch SmartGit
You can now launch SmartGit by running the following command in the terminal:
$ smartgit
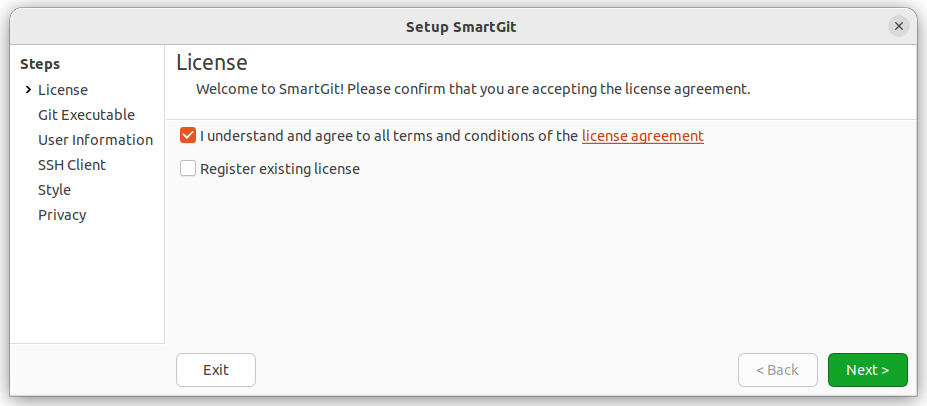
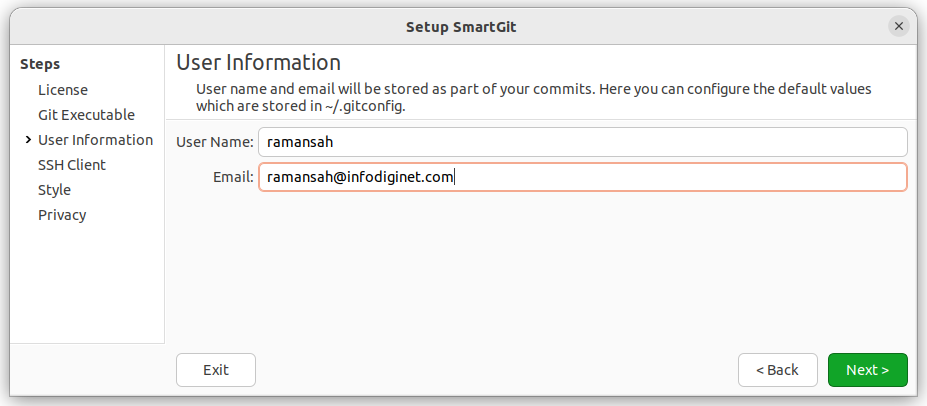
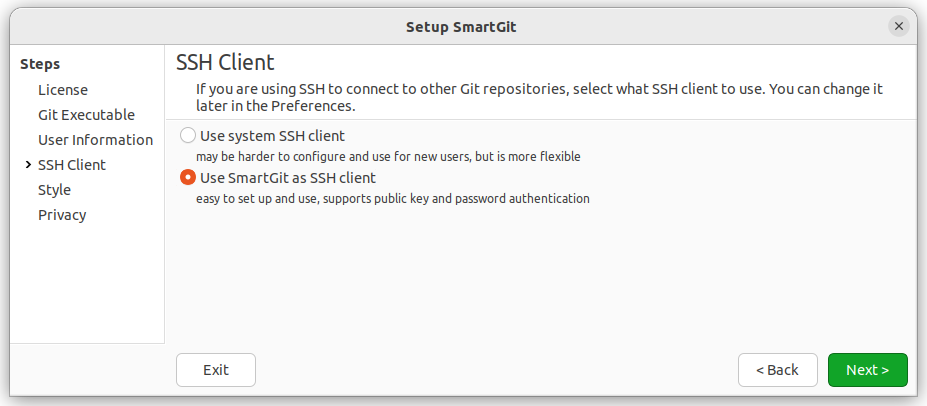
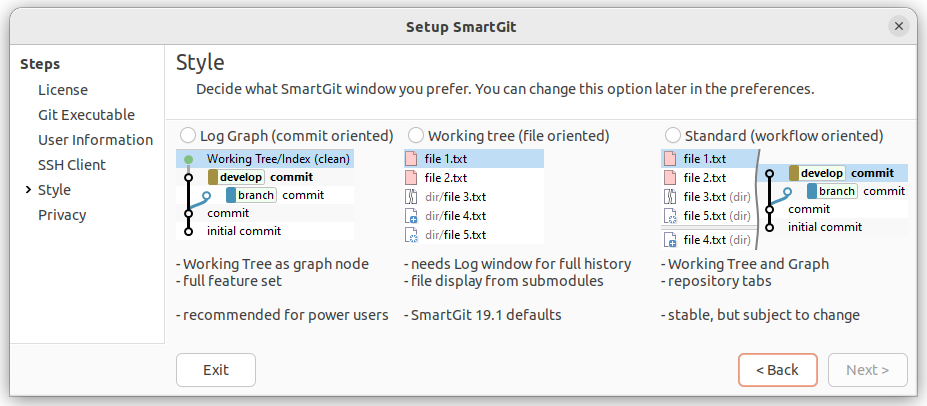
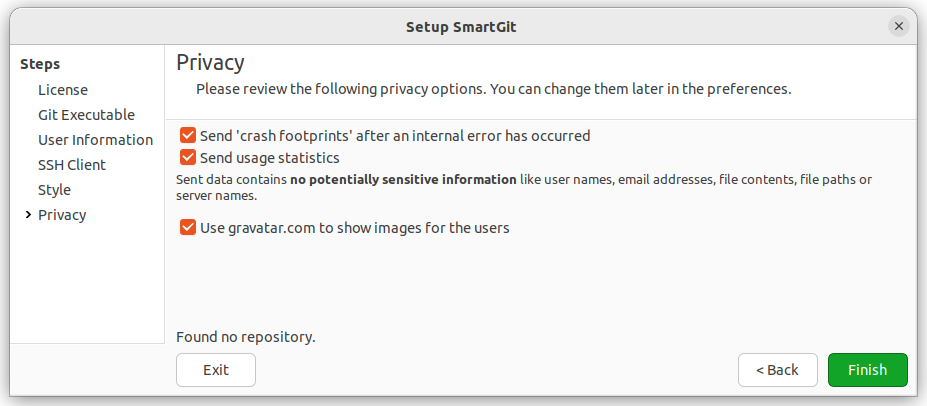
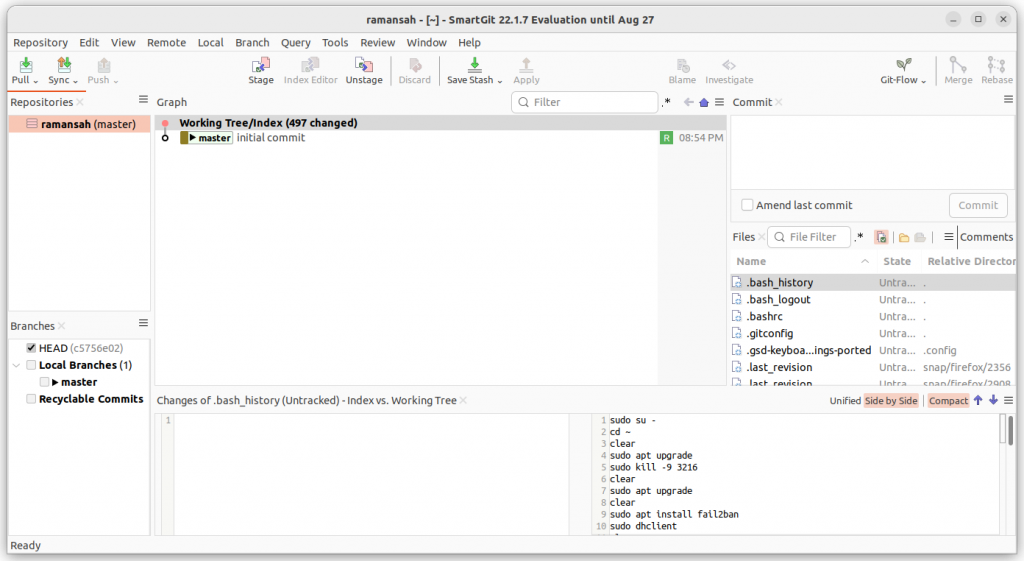
Running SmartGit On Ubuntu 22.04 Desktop
After the SmartGit installation process is complete, the next step is to perform the initial configuration before running SmartGit. The following are some print screens from SmartGit the first time it runs.
Conclusion
We have successfully installed SmartGit on our Ubuntu Linux system. SmartGit provides an intuitive and powerful GUI interface for working with Git repositories, making it a valuable tool for developers working on version control. With SmartGit, you can efficiently manage your Git projects and collaborate with your team to streamline your development workflow. Enjoy using SmartGit for your version control needs!