Creating a Specific User for Docker Group in Linux
Docker is a powerful tool for containerization, but running Docker commands as a non-root user is recommended for security reasons. To achieve this, we can create a specific user for the Docker group, which allows that user to execute Docker commands without requiring sudo privileges. In this article, we will guide you through creating a dedicated user and adding them to the Docker group on a Linux system.
Why Use a Specific User for Docker?
Using a dedicated user for Docker provides several advantages as mentioned below :
- Enhanced Security: Running Docker as a non-root user mitigates potential security risks, as containers can be isolated from the host system.
- Granular Control: You can grant Docker privileges to specific users, limiting access to container management.
- Isolation: Different users can have their Docker environments, avoiding conflicts and ensuring that changes made by one user don’t impact others.
- Enhanced Collaboration: Multiple users can collaborate on Docker projects while keeping their configurations separate.
How to Add User to Docker Group
Here are steps to create a specific sser for Docker:
1. Ensure Docker is installed
2. Create a New User
3. Add User to the Docker Group
4. Test Docker Access
Step 1: Ensure Docker is installed
Before creating a specific user for Docker, ensure Docker is installed on our system using your distribution’s package manager. To verify if Docker was installed we can use the following command line.
1.1 Verify Docker version
To verify Docker version, we will use following command line :
$ sudo docker --version
Output :
ramansah@infodiginet:~$ sudo docker --version
Docker version 24.0.5, build ced0996
1.2 Verify Docker service
We will find out, if Docker service is already running properly in the system by submitting following command line :
$ sudo systemctl status docker
Output :
ramansah@infodiginet:~$ sudo systemctl status docker
[sudo] password for ramansah:
● docker.service - Docker Application Container Engine
Loaded: loaded (/lib/systemd/system/docker.service; enabled; vendor preset: enabled)
Active: active (running) since Sun 2023-10-15 21:47:47 WIB; 2min 17s ago
TriggeredBy: ● docker.socket
Docs: https://docs.docker.com
Main PID: 1370 (dockerd)
Tasks: 41
Memory: 42.0M
CPU: 2.517s
CGroup: /system.slice/docker.service
├─1370 /usr/bin/dockerd -H fd:// --containerd=/run/containerd/containerd.sock
├─2163 /usr/bin/docker-proxy -proto tcp -host-ip 0.0.0.0 -host-port 9443 -container-ip 17>
├─2168 /usr/bin/docker-proxy -proto tcp -host-ip :: -host-port 9443 -container-ip 172.17.>
├─2184 /usr/bin/docker-proxy -proto tcp -host-ip 0.0.0.0 -host-port 8000 -container-ip 17>
└─2189 /usr/bin/docker-proxy -proto tcp -host-ip :: -host-port 8000 -container-ip 172.17.>

Okt 15 21:47:37 infodiginet dockerd[1370]: time="2023-10-15T21:47:37.321795605+07:00" level=info msg=">
Okt 15 21:47:38 infodiginet dockerd[1370]: time="2023-10-15T21:47:38.212095703+07:00" level=info msg=">
Fortunately, in our lab the Docker has installed and running properly. If Docker is not installed on our Linux system, we can install it using system’s package manager as explained on How to install Docker on Ubuntu 22.04 LTS operating system article.
Step 2 : Create a New User
In this tutorial, we will create a new Linux user who will have access to Docker. For this purpose we will submit following command line:
$ sudo adduser mpik
Output :
ramansah@infodiginet:~$ sudo adduser mpik
Adding user `mpik' ...
Adding new group `mpik' (1002) ...
Adding new user `mpik' (1002) with group `mpik' ...
Creating home directory `/home/mpik' ...
Copying files from `/etc/skel' ...
New password:
Retype new password:
passwd: password updated successfully
Changing the user information for mpik
Enter the new value, or press ENTER for the default
Full Name []:
Room Number []:
Work Phone []:
Home Phone []:
Other []:
Is the information correct? [Y/n] Y
As shown above, we will create a new user called as mpik.
Step 3:. Add User to the Docker Group
In most cases, the Docker group is created during Docker installation, we can check if the group exists by running following command line :
$ more /etc/group|grep docker
Output :
ramansah@infodiginet:~$ more /etc/group|grep docker
docker:x:999:ramansah
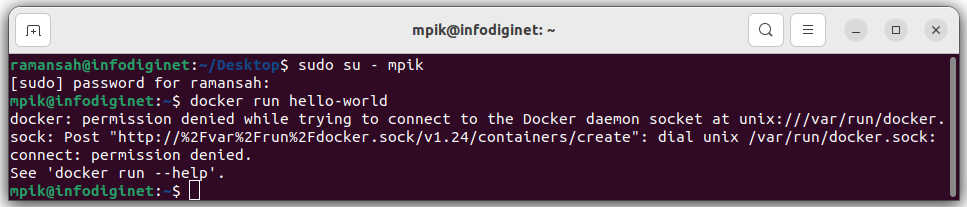
Before adding a new user for Docker group, we have tried to use Docker container testing by submitting command line :
$ docker run hello-world
Output :
mpik@infodiginet:~$ docker run hello-world
docker: permission denied while trying to connect to the Docker daemon socket at unix:///var/run/docker.sock: Post "http://%2Fvar%2Frun%2Fdocker.sock/v1.24/containers/create": dial unix /var/run/docker.sock: connect: permission denied.
See 'docker run --help'.
From an example above, there is a registered user on Docker group, in this section we add a new user called as mpik to be apart of Docker group.
$ sudo usermod -aG sudo mpik
$ sudo usermod -aG docker mpik
$ more /etc/group|grep docker
Output :
ramansah@infodiginet:~$ more /etc/group|grep docker
docker:x:999:ramansah,mpik
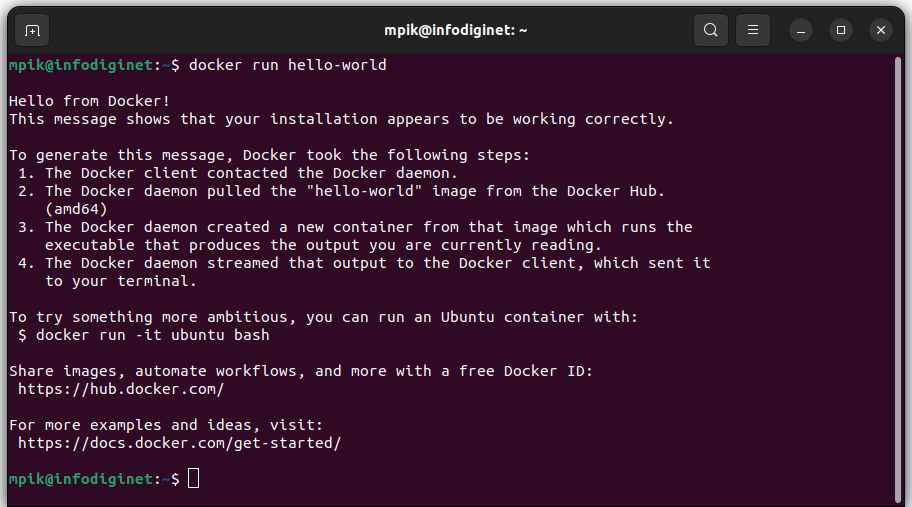
After all done, we will reboot our system to take effect. A new user as called as ‘mpik’ has been registered as Docker group. Then we will test it by switching to this user and do run hello-world testing command line.
ramansah@infodiginet:~/Desktop$ sudo su - mpik
[sudo] password for ramansah:

mpik@infodiginet:~$ docker run hello-world

Hello from Docker!
This message shows that your installation appears to be working correctly.

To generate this message, Docker took the following steps:
1. The Docker client contacted the Docker daemon.
2. The Docker daemon pulled the "hello-world" image from the Docker Hub.
(amd64)
3. The Docker daemon created a new container from that image which runs the
executable that produces the output you are currently reading.
4. The Docker daemon streamed that output to the Docker client, which sent it
to your terminal.

To try something more ambitious, you can run an Ubuntu container with:
$ docker run -it ubuntu bash

Share images, automate workflows, and more with a free Docker ID:
https://hub.docker.com/

For more examples and ideas, visit:
https://docs.docker.com/get-started/
At this point we have created a new user called as ‘mpik‘ and add it to Docker group. Atter all are set the we test it r
Conclusion
Now that we have a specific user set up for Docker, they can create, manage, and run Docker containers while enjoying the benefits of enhanced security and isolation. Be sure to monitor their activities and manage their access to ensure the security of your Docker environment. Remember to grant Docker group membership to trusted users only, as it provides powerful privileges that can impact the host system’s security.